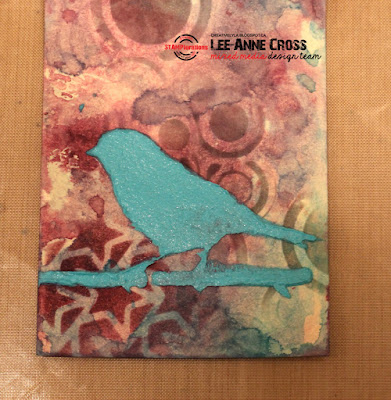
Hello, crafty lovelies...it's Lee-Anne here with a tag tutorial for you today.
- add a background using the Retro Circles stencil and some Archival Ink to your manila tag.
- ink up a craft mat with three shades of Distress Ink and mist with water
- drag the tag through the ink/water combination several times until you've achieved the depth and color you'd like. I like to dry it and then keep adding more color until I'm happy with it.
- mist the same stencil with some water
- flip it over onto your tag and press with a rag or paper towel. This adds a "ghosting" effect which will provide more interest for your background.
- add more color with Distress Ink and the Stars Align stencil
- mix up some Fiber Paste and a drop or two of ink to create a lovely shade of blue
- add it through the Some Birds stencil and let dry
 |
- ink the edges of your tag with more Distress Ink
- mix a drop of ink with some water and use a paintbrush to splatter it on your tag
- add the sentiment from ART IS and some ribbon
Thanks for joining me today. Hope I've inspired you in some way!
ARTplorations stencils used:
STAMPlorations stamps used:


Very creative how you've built up the background layers. Great choice of colours and that bird just pops out beautifully. Thank you for the inspiration x
ReplyDeleteStunning tag Lee-Anne! Thanks for sharing!
ReplyDeleteI'm ready for the bluebirds to come back Lee-Anne but for now... I truly enjoyed your LOVELY and FUN creation! Thanks bunches for super inspiration. j.
ReplyDeleteGreat tag, love the background.
ReplyDeleteFabulous card. The bird and the colors in the background are a smashing combination.
ReplyDeleteGorgeous tag. Thanks for all the wonderful tips on layering Lee-Anne!
ReplyDeleteWhat a joy to see all your creative steps Lee-Anne:-) Love your stencil and color choices. Your bird and sentiment were the perfect final touch! TFS my friend.
ReplyDelete